You may have come across Performance Considerations for SQL Server in Azure Virtual Machines and wonder what the recommendations would look like in practice.
Below walks through most of the recommendations.
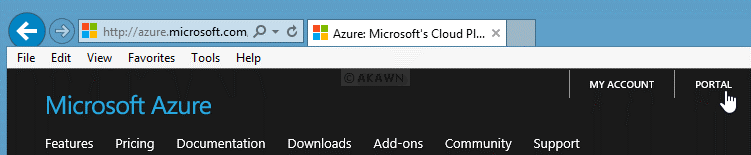
First, connect and log into the Azure portal.
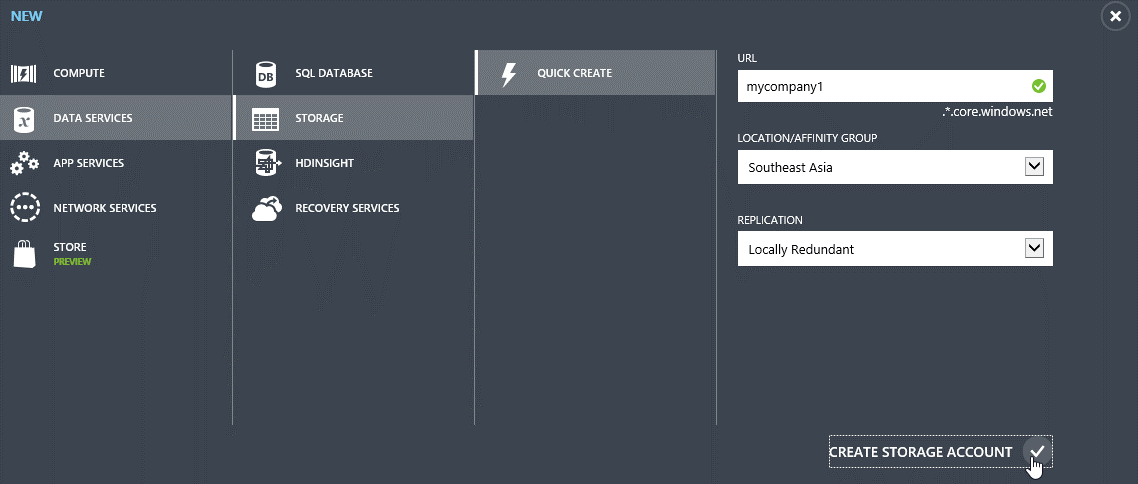
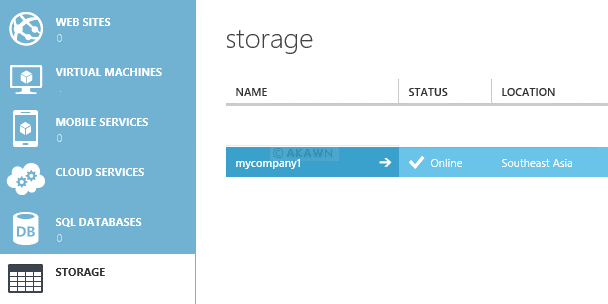
Create a storage location.

Performance Check: Disable Azure geo-replication on the storage account.
Note: From a security perspective, it would be best not to use your company name.
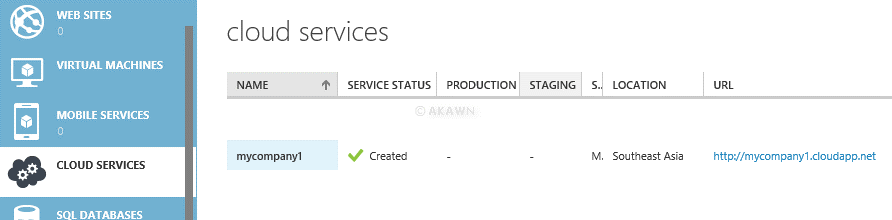
Create a cloud service if you don’t have one already.
Performance Check: Keep the storage account and SQL Server VM in the same region.

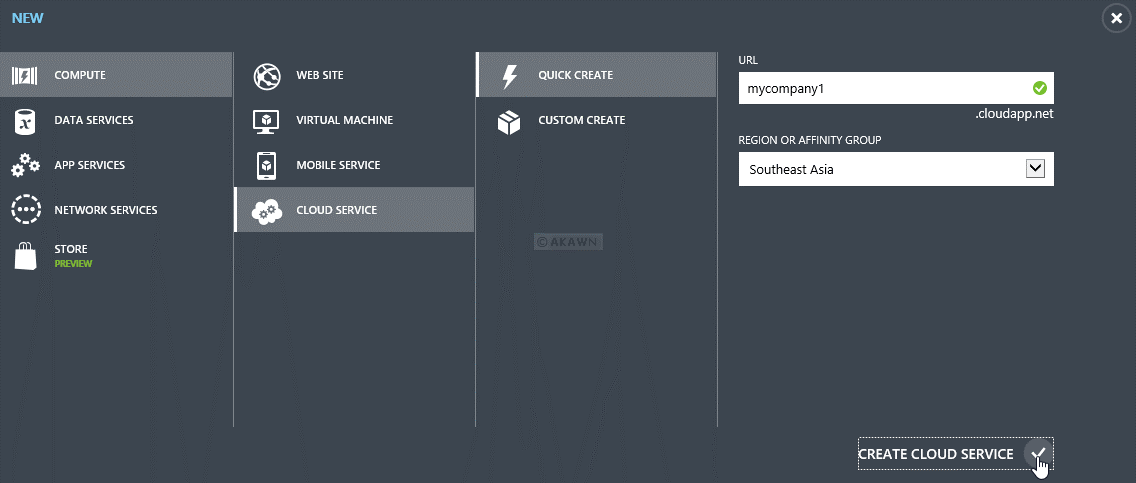
Both the Storage and Cloud Service will be located in Southeast Asia.
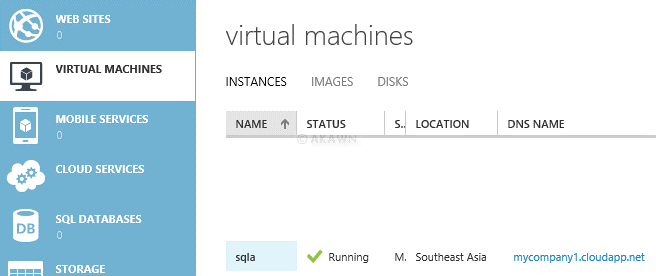
Create the SQL Server VM.


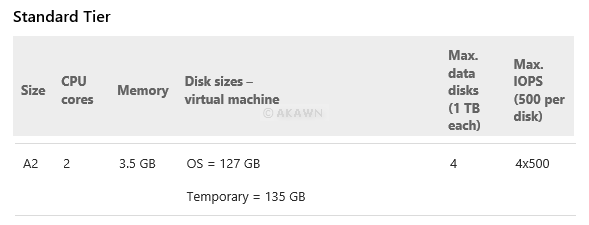
Performance Check: Use minimum Standard Tier A2 for SQL Server VMs.
If you have purchased SQL Server core licences, you should typically use a 4 core VM as this is the minimum licences you can have per VM.
Note: By adding extra CPUs, the base virtual machine running costs increases.


Note: The Antimalware is still in preview at the time of this blog. This application may impact SQL Server performance if exclusions for the SQL Server files are not in place. If you find that the application impacts the server, it can easily be removed via the control panel in the VM, if required.

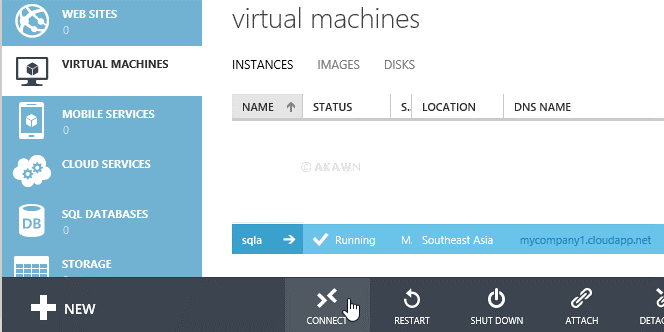
The virtual machine will be provisioned and started.
Notice that the below VM is located in Southeast Asia as selected during the install.
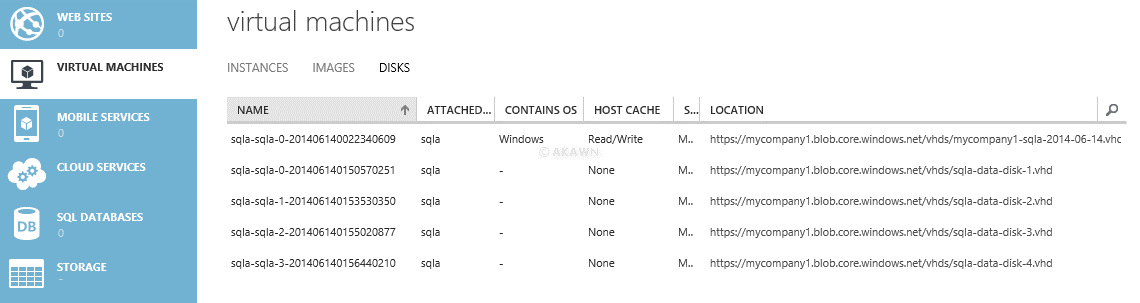
At the time of this blog, the A2 VM supports up to 4 data disks.
Performance Check: Avoid using operating system or temporary disks for database storage or logging.
Note: Microsoft has stated ‘Locally redundant storage (LRS) is replicated three times within a single data center. When you write data to a blob, queue, or table, the write operation is performed synchronously across all three replicas. LRS protects your data from normal hardware failures.’, with this in mind, RAID level protection is not required.

Performance Check: Avoid using Azure data disk caching options (caching policy = None).

Repeat the above and add another 3 disks.
Note: If you try add more than 4 disks to the A2 VM, you’ll receive the following error:

Below shows all 4 disks added.
Notice that the C drive uses Read/Write cache which is not recommended for SQL data/log files.
Connect to the new VM.
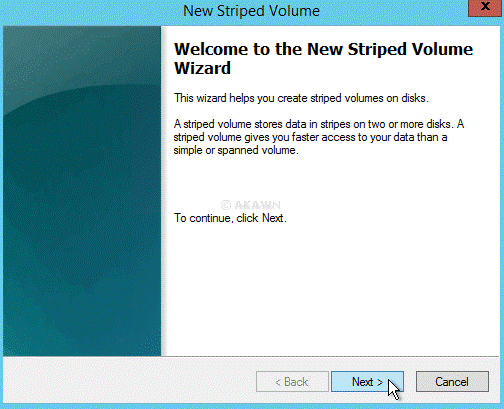
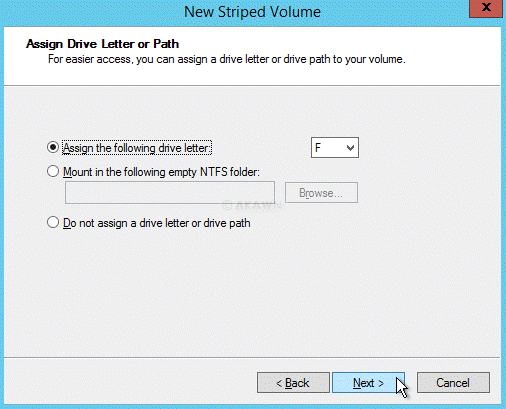
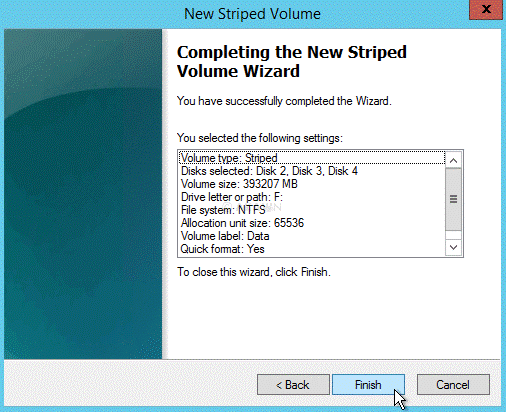
Performance Check: Stripe multiple Azure data disks to get increased IO throughput.


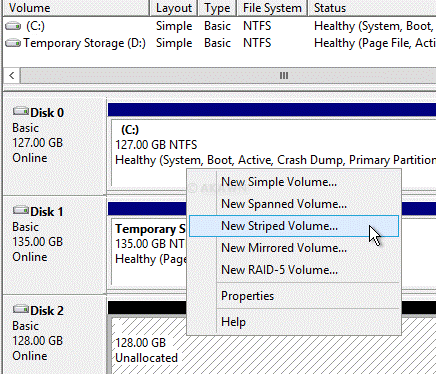
Microsoft notes: ‘For Standard tier A2, we recommend a configuration of three data disks for data files and tempdb, and one data disk for log files. Depending on whether your workload is data or log sensitive, you can adjust the number of disks dedicated to data or log storage pool accordingly.’
‘VMs allowing more than 4 disks to be attached, place the data and log files on separate disks or storage pools’.
For Production VMs with core licences, you would most likely use at least 4 CPU’s as that is the minimum licences allowed per VM and therefore would be able to assign more disks to the VM.

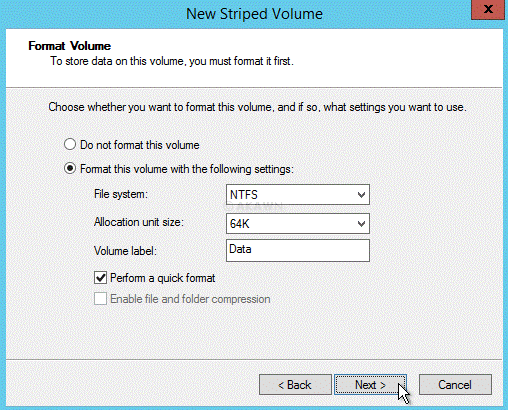
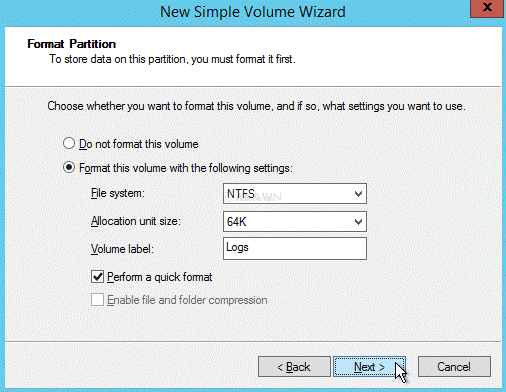
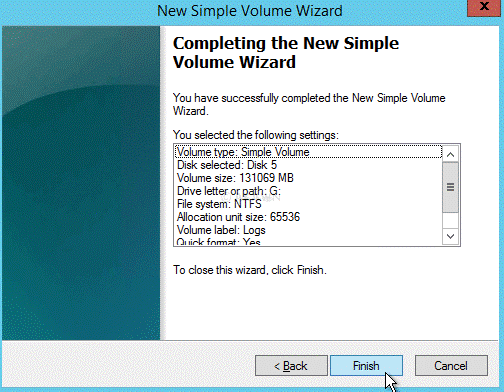
Performance Check: Format with documented allocation sizes.
Microsoft notes: ‘NTFS allocation unit size: When formatting the data disk, it is recommended that you use a 64-KB allocation unit size for data and log files as well as tempdb.’
The F drive will now show.
Performance Check: Separate data and log file I/O paths to obtain dedicated IOPs for data and log.


For this demo, I’ll use a local account called SQLService for the SQL Server service and SQLAgent for the SQL Server Agent service account. You’ll likely use a domain account instead for your environment.
Neither of these accounts are a member of the local Administrators group on the server.
Performance Check: Enable instant file initialization for data files.
Performance Check: Enable locked pages.
Note: The SQL Server Agent service does not require these privileges.


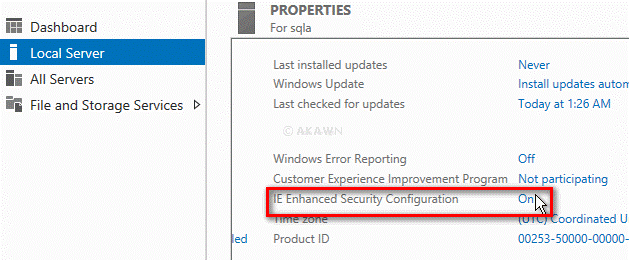
I’ve downloaded SQL Server 2014 evaluation edition (http://technet.microsoft.com/en-US/evalcenter/dn205290) to go through the remaining steps.
Note: Internet Explorer is heavily locked down by default and you may need to disable ‘IE Enhanced Security Configuration’ to use it successfully.

During the install of SQL Server the following will be addressed:
Performance Check: Setup default locations.
Performance Check: Move all databases to data disks, including system databases.
Performance Check: Move SQL Server error log and trace file directories to data disks.
As shown below the Shared features can remain on the C drive, but the Instance root directory should move the new Data drives.

Notice the F drive below. This takes care of the SQL Server error log and trace file directories.

As shown below only the log files will use the G drive:
Note: The Backup location should reflect your backup strategy.

Once the install is finished:
Performance Check: Apply SQL Server performance fixes.
The latest patch info with recommended patch levels can be found here
The following SQL database settings complete the check list:
Performance Check: Limit or disable autogrow on the database.
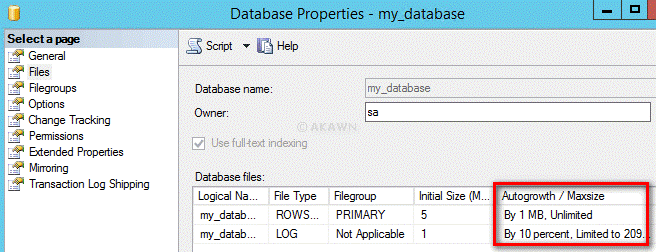
Performance Check: Disable autoshrink on the database.

Performance Check: Consider enabling database page compression (Note: Available on Enterprise Edition only.)

Or

I would also suggest:
Review and set a minimum and maximum memory threshold (also for Reporting Services and Analysis services, if used).
The following shows the memory settings for an A2 instance which has 3.5GB and no Reporting/Analysis services.

Enable backup compression by default.

That should be it for now.
Hi,
Thanks for writing this up. Using the above we managed to move from a single disk to a stripe and have dramatically improved our SQL Server.
Thanks